We have all survived the summer!

Yep, me and the kids survived with only one or two scratches to show for it 😂 The Big One is now a Primary 2 and the Little One in his pre-school year of nursery. Honestly, if I wasn’t a scientist with a strong handle on the linearity of time, I would swear that the years go by faster when kids come along.

We enjoyed trips to the library, paddling pools and bouncy castles in the back garden, trips to soft play and a holiday to Centerparcs in Whinfell Forest. The Lake District hadn’t had rain for 6 weeks when we got there, but after the heavens opened and it poured on our last night, every path through the park seemed to be covered in hundreds of tiny baby frogs – what an unbelievable sight it was! New animal friends were made, clothes were dirtied, knees were skinned and we had a fabulous time.

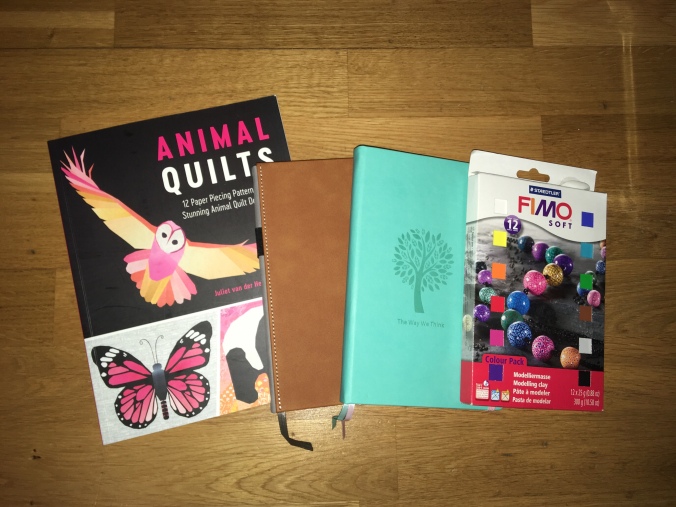
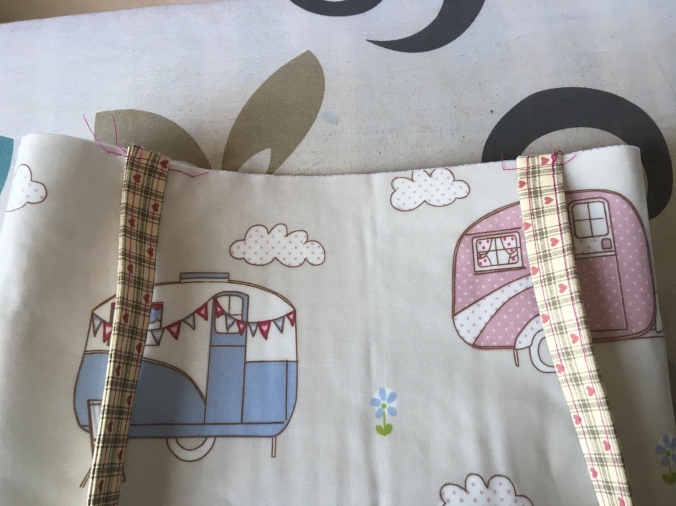
But it’s time to get back to the serious stuff now. More so for me, as I took the plunge this summer and decided to start my own business! It’s something I have been thinking about for a long time, and I’m constantly being told I should sell my makes. I’ve always put it off as it seemed too complicated, too risky, too much work. But the idea is always there. After a lot of thought and research, and the advice and support of a few friends and family I bit the bullet and went for it. If you would like a nosey you can find it on Etsy and on Facebook. It’s called The Lighthouse Rose because I really wanted a name that would capture a little of my English background with the fact that I live in a beautiful seaside town in Scotland. I’m a bit in love with it really, and am already thinking of lots of themed products.

It’s going to involve some extra work, some extra hassle and a big dose of patience, but you never know until you try, eh? Since like most crafters I have multiple interests, my little online shop is a bit of a mix – I have purses, bags, cute drawstring project bags, pouches and decorated crochet hooks in there at the moment. I will be adding some stitch markers, possibly some simple jewellery, and some hand dyed wool. I have been having so much fun this summer with polymer clay and wool dyes that I just can’t resist!

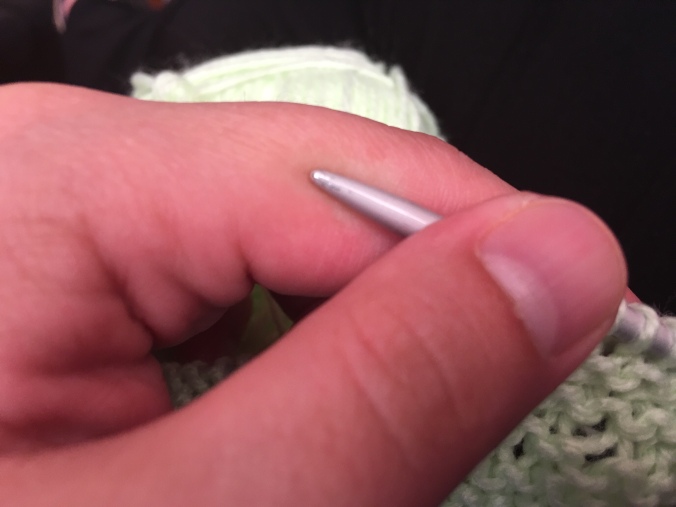
Since unfortunately we are approaching autumn and in this wee seaside town, that means blustery cold winds, my extra pretty hand dyed wool experiments have been earmarked for hat projects. The two red ones are specifically for the big one as he requested a red home made hat, what a sweetie pie he is! But here are a couple I made using my luscious pinks 😍

The bigger one with the button is a slouchy fit and I think I may have to keep that one for myself….. But the other will either go in my online shop or wander down the road to my local wool shop 😀

And as for polymer clay, well it’s another craft that I can share with the Big One as he has caught the bug for it – in fact he has cost me a small fortune this summer buying him his own little clay stash for his own projects. He’s so adorable, the first thing he wanted to make was earrings for me. Be still my beating heart ❤️

I’m really excited about my little shop – I have no idea how it will go but I guess I’ll find out in the coming months and years. I have to remember though that sewing is my “therapy” and if it ever becomes a chore, that’s when it is time to quit. And I must also make time to sew for myself and my boys too – in fact I’ve been doing a little selfish sewing this weekend. More on that in another post though. For now, the roast dinner is calling me 😀

Love Mrs B x

Nostalgia

For the last few days, The Big One has been asking me to teach him to knit. He’s never seen me knitting, because I don’t, so I thought he meant crochet. I’ve been tinkering with a few crochet projects recently including this Jellyfish from Repeat Crafter Me.

But no – he wants to KNIT. So off I went to the loft today to find my Nan’s knitting needles. We lost her 5 years ago now, but I’ll never part with these needles. They are worn and scratched, the plastic ends are yellowed, there is no paint left on the tips, but they are my treasure. And to go with them is a huge basket of random balls of wool which I swear still smells of her.

And so I find myself sat here, trying to figure out knitting so that I can help my boy…. And honestly right now I’m rubbish at it!

As I make an absolute mess of this small practice swatch, the little scratches catch my eye and remind of the clicking sound of her knitting when I was a child.

However, I have a few exciting projects in the conception stage which would benefit from me actually cracking this, so I must persevere!

It seems that reminiscing is a bit of a theme this past week or so, as at my real job we bade farewell to a good friend who went off into the sunset to enjoy his retirement. As the first ever Stillman for Hendrick’s Gin, he has made a bit of history. In honour of his retirement, and to show him just how much I am going to miss him, I created a Hendrick’s themed mini quilt just for him.

I used freely available patterns for the roses and the tea-cup , but self drafted the cucumbers, H, and gin bottle myself. Boy were those cucumbers tough! But I have to admit to getting a real kick out of working out the paper piecing and I would definitely consider drafting patterns for myself again. I can see a few things I would do differently but it was a great experience. And I think they look just perfect. Hopefully my friend will enjoy his quilt for many years to come, and look on it with fond memories. However, he is definitely not getting rid of me easily and he can bet I’ll be wanting regular catch ups!

This week also marked the end of The Big One’s first year at primary school. This year has flown by, and the difference in him is just amazing. He’s smart, curious, imaginative, and full of dreams. I think he may possibly have inherited my love of making too, as when I asked him for a bit of input on a gift for his teacher, he just threw himself in to it. And then harassed the life out of me to get on with gifting it 😂 We went with a tote bag that is all business on the outside, but contains the most adorable illustrations in the lining 😍

Excuse the black splodges – that was me just blocking his name for privacy. This pattern is a brilliant freebie from Bagstock Designs, The Pelican Tote. Go grab it if you are a bag making type!

Back to the practice knitting and reminiscing for me – it will not beat me!

Love Mrs B x

2 months gone in the blink of an eye 😉

Ok, ok, I know it’s almost the end of June and I’m only just about to talk about Me Made May. In my defence, there are two family birthdays in May, plus I set myself a few creative challenges and ran a Sew Along in Bag Making Adventures and More. And June has so far had a tonne of work (in my real job), a sew Along, Father’s Day, a visit from my family and a wedding. It has been a busy couple of months indeed! So here is what I’ve been up to.

Me Made May 2018

Me Made May is a challenge that has been running for several years now, started by Zoe at So, Zo and is aimed at making those of us who sew our own clothes think about the content of our wardrobes and give a little extra appreciation to what we have made. It can be interpreted in whatever fashion you want, but essentially you are to make a pledge for the month of May that challenges you in some way with regards to your Me-Made wardrobe. Being new to garment making, I had to engineer my challenge carefully to best utilise the fairly small number of items I have. My pledge went like this:

I, Leanne Borland of mrsbcreatesblog.wordpress.com, sign up as a participant of Me-Made-May ’18. I endeavour to wear at least one me-made article of clothing every non-working day throughout May 2018. I will also make a minimum of 2 new items using fabric in my stash, and will print and make the necessary full bust adjustments to a woven shirt pattern ready to sew in May or June.

I choose not to go Instagram mad taking photos of my outfit every day, because, we’ll I’m just not a selfie girl…. However, I smashed my challenge! I work three days a week and wear a “uniform” of sorts so on those days I let myself off with it if I had nothing me made, but I managed to wear almost my entire me-made collection, with the exception of one top that I made a mess of and only put on for hanging about the house.

For new items made using fabric from my stash, I first went with a Made for Mermaids Mama Nina in this very light, drapey stretch blend from Girl Charlee. I must admit that I already have two other Mama Nina’s in top length (one short sleeved, one long sleeved), so thought I would try out the tunic length curved hem. I just love this pattern – it’s so quick and easy to sew, is cute on, and is really comfortable. Winner all round!

Next I went for another Made for Mermaids pattern, the Mama Isabel, in this navy blue hummingbird floral cotton Lycra that I have been hoarding for months 😂 I’ve been wanting to try this one for a while as the pattern can make the most gorgeous maxi dress with a high low hem, but I thought I’d give it a go in top length first to have a look at fit. I had to do a bit of scary grading on this to get the bust measurements right but it went really well. I think though that the torso is a touch short on me which means that the waist sits too high – it almost looks like it’s trying to be empire line but it really isn’t meant to be. Live and learn! But still a totally wearable top and I know what to do when I tackle that maxi dress 😀

I also made myself a pair of trousers using the the Patterns for Pirates SOS Knit Pants pattern and some plain black ponte Roma. I went for a straight leg option, plain front and back pockets. They are so comfortable and I’m really pleased with the fit so will definitely make more. I really like trousers but have gotten into the habit of only ever wearing them for work so this might give me a good excuse to wear more. Plus I’ve noticed a lot of people use this pattern to make cute summer shorts which is seriously tempting me given all this good weather we’ve been having 😀 Do you know how difficult it is to photograph black trousers!?!

And not strictly Me Made May for me, but I made my boys some cute pants for a sew along in a fabric group I’m a member of. This is the Speedy Pants pattern from Made By Jack’s Mum with options for both briefs and boxers in the pattern – perfect for my Big One and Little One!

PlannerParty2018

Aside from Me Made May, I thought I’d have a look at my #PlannerParty2018 goals, since the original instigator I linked up with, Quilting Jetgirl, posted about a mid year review.

My quilting goals have unfortunately been neglected. My number 1 commitment was to finish my Honey Pot Bee quilt that the individual blocks were completed for in 2017. I have made some progress here in that I have finally decided my layout and have pieced together the first section. But I really need to get going with this! I had also hoped to use up some of my orphan blocks and I still aim to do this with a few ideas tinkling about in my head 😉

Secondly, I planned to complete at least one project from the Animal Quilts book – I have selected my project, printed my pattern pieces and even bought the fabric for this. I’m keeping the details under wraps at the moment though….

The patchwork cushion cover I planned for my local craft show remains untouched I’m afraid 😐

I had 6 bags I planned to complete, all new patterns that I hadn’t made before. I have now done 3 of these and I love them all! The first one here in green cotton spool print and yellow faux leather is the Emmaline Retreat Bag and it is now home to my scissors and rotary cutters! The second in rainbow splatter print and cork is the Little Moo Designs Craftinator Project pouch and is my new journaling pencil case. The third is the Emkie Designs Midsummer Nights Traveller at 80% in Alison Glass Ex Libris fabric and pink faux leather.

Still to be done are 2 handbags and anther project pouch type thing, and I’m looking forward to finding the time to fit them in!

My clothing goals have definitely been the most successful so far. I endeavoured to make a minimum of 6 items to include as dress and a pair of trousers. I have made many more than 6, ticked off the trousers as above, and made this fabulous dress for a wedding I attended this weekend. It’s a Made For Mermaids Mama Catherine with a lined lace yolk and flounce sleeve. It was so comfortable to wear, and I suspect significantly cooler than some of the dresses I saw other people wearing in the sweltering hot sun! Incidentally, I also made my bag to match, a Little Moo Designs Tainted Love Clutch in the rose fabric from the dress, black/gold quilting cotton and soft, distressed black nappa leather.

Only one item remains on my clothing goals wish list to make – a zip up jacket. However, I have the fabric in my possession and the pattern printed and cut out ready for me to start 😀

Phew, that was a long one. And it doesn’t even include everything I’ve done! But I’m heading for July with a couple of other ideas for things I’d like to do and will hopefully complete a project I started planning in May, so will have plenty to tell you. I will also be able to reveal a couple of gifts I’ve made once they have been received by their rightful owners. Off I pop now to update my journal before I forget everything…

Love Mrs B x

Appliqué coin purse tutorial

I thought I would share a short tutorial on making these extra cute coin purses today! They make brilliant little gifts and are so handy to have, and I quite often get asked for them. This week my mum asked me for a couple of small purses so it was perfect timing to pass on the knowledge both here and in the Bag Making Adventures and More Facebook group.

My method of putting the zipper in these is a little different to a lot of the tutorials out there – I don’t use tabs but keep most of the zipper tape out of the side seams by turning it at an angle. You’ll see what I mean by this below. It can be a little fiddly but I really like how neat these look. Note that you absolutely need a zipper with a stop for this, zipper tape by the metre will not work.

The appliqué dog on these was based on an image I found on Pinterest. You need something fairly simple that you can easily break down into component parts that are large enough to cut and sew. I drew out what I wanted the final picture to look like, then traced each component part separately to give me templates to draw around. Think carefully about how the pieces will go together and if there will be any overlapping. Simple is definitely best here!


Supplies List

Outer Fabric – 2 rectangles 6 x 4 inches

Lining Fabric – 2 rectangles 6×4 inches

Fusible Interfacing – 4 rectangles 6×4 inches

Fusible fleece – 2 rectangles 5.5 x 3.5 inches

Scraps of faux leather and vinyl

7 inch all purpose, closed end zipper


Method for purse construction

1. Prepare your outer and lining fabric pieces by fusing interfacing to them all. Fuse fleece to the outer pieces leaving a 1/4 inch border on all sides.


2. Cut out your appliqué pieces – for this dachshund I have 5 pieces; a tail, main body, ear, collar and nose. I cut the tail a little longer than required so that it tucks underneath the main body piece.

img_4214

3. Work out the order that you need to sew your pieces – remember that you need to start at the bottom and add layers upwards. Here, I’m starting with the tail, adding the body piece on top, then the collar, then the ear and nose. Have a play with the pieces so you know exactly how you want them and practice positioning them. Take photos to help if needed.

img_4220

4. Start with your lowest piece – I glue my pieces and take my time about it, but you could use double sided take for a quick fix instead. WARNING – if you use regular double sided tape, keep it out of your stitching lines because it will gum up your needle and you will swear later! However, the wash away tape you can get for hems is perfect and can be sewn through (but it is pricey).

img_4660

5. Sew around your piece 1/8 inch from the edge using a longer stitch length (3-3.5 is perfect). Remember to use a Teflon/roller/walking foot to help with this as a regular foot can drag. I didn’t take my own advise here and you can tell… Pull your threads through to the back and tie off.

6. Add the next layer on top, the body piece for me, fixing with glue or tape as required. Sew in the same manner, and continue layering up your pieces until you have completed your appliqué.

7. On the top edge of each outer piece, mark 3/4 inch in from each side, then lay your zipper on top FACE DOWN. Now comes the tricky bit – at the closed end of the zipper, fold the tape upwards at a 90 degree angle as close to the stop as you can get, and line up the vertical part of the zip teeth with the 1/2 inch mark on one side and pin or clip. It’s clearer what this means if you look at the picture below. Pin along the zip until you get to the mark on the other side, then fold the tape and pin again. Remember that the teeth on the zip that are now pointing upwards should line up with the mark. This side is trickier as it’s loose, so if you have any trouble with it put a couple of basting stitches in the end to secure it.

img_4244

8. Baste the zipper in place, sewing with 1/8 inch seam allowance.

9. Lay the lining piece right side down onto the basted zip, then sew in place with a 1/4 inch seam allowance. Trim the zip ends.

img_4245

10. Turn the panels so that they are wrong sides together, press away from the zipper and topstitch at 1/8 inch.

11. Repeat steps 7-10 for the other side of the zipper.

img_4250

12. OPEN YOUR ZIPPER! Flip the panels so that the lining pieces are right sides together, and outer pieces right sides together. Take care to make sure that the outer top edges are nicely lined up.

13. Sew around all 4 edges, leaving a 4 inch turning hole in the bottom of the lining. Go slowly over the join between lining and outer as it can be bulky here, even without the zipper in the seam.

img_4251

14. Trim the corners and turn the purse right side out. Poke out the corners, and seal the hole in the lining either using a very narrow seam allowance on the machine, or by hand using a ladder stitch.

And you are done!

However, if appliqué isn’t your thing – skip the steps on this and use plain panels front and back. If you want to jazz it up a bit, use a bit of faux leather or vinyl as an accent instead. Not big enough for you? Change the size – make them longer, deeper or both. Up to you. You could even make patchwork panels if you like. Here are a few others I did for small gifts. Cute, aren’t they!?

Hope you enjoyed this tutorial (despite my rubbish photos 😂), and do let me know if you make any.

Love Mrs B x


Catch All Tote Sew Along!

So I was a bit naughty and didn’t manage to get a post up in March, but in my defence I was working my little socks off on a top secret project that I will unveil in a couple of months. I finally finished the thing last night so I thought I’d take the bull by the horns and check in here right now!

April is a mega busy month for me as it is my wedding anniversary, The Big One’s Birthday, my nephew’s birthday and my birthday. It generally goes by in a blur. However, to add to all the madness, a friend and I set up our own bag making group on Facebook so have been busy with that. We wanted a UK based group that would host lots of sew alongs and tutorials and be a great learning place for both absolute beginners and experienced bag makers alike. We are small at the moment, but in my opinion perfectly formed 😀 If you’d like to join us, search for Bag Making Adventures and More and you’ll find us….

Anyhow, our first Sew Along is kicking off officially tonight, 14th April, which is so exciting! We’ve chosen to go for a simple tote bag for our first pattern, the Catch All Tote by Lean Mean Sewing Machine. We like it because although simple, it is so easy to modify to make it your own by adding embellishments, pockets, trims, changing the panels etc. So without further ado, here are the two I made!


For the first, I chose to leave off the vinyl accent called for in the pattern and cut out simple, plain panels – to do this, just cut the outer pieces the same size as the lining pieces. I used a heavy jacquard fabric here so skipped interfacing and just applied fleece. Now, the pattern tells you to sew down the sides and along the bottom, then cut out the corner pieces and reinforce the seams. This means to basically add a few extra stitches at the places I’ve marked in red below to strengthen the seams ready to “box” the corners of the bag. There are other ways to do this, and I’ll show you one of them on bag two in a short while.

5802994C-3BA6-44B7-B10A-188119037B72.jpeg

For this one, I also decided change the handles so rather than sewing handles into the top seam (I’ll come back to that), I completed the construction of the bag, top stitched and then riveted leather handles on afterwards. Selfish reason here – I need to find something to do with a totally impractical patent leather hide I bought a while ago for no real reason 😂

For bag two, I went with oilcloth and vinyl accent in the dimensions given in the pattern. Again, because these are heavier materials, I did not interface the outer, just added fleece. My lining in both bags was interfaced cotton. I have to say it though, I HATE OILCLOTH! It is a nightmare to sew. Never again 😂 What I did for this one was constructed the outer panels, added the fleece and then top stitched the seam between the vinyl and the oilcloth. I do it this way because I feel that it’s a nice bit of extra security for the fleece. Then I cut the corner sections out before sewing the panels together for both the lining and the exterior panels. Sewing the sides and bottom after cutting out the corners means you can backstitch at the ends as you go. Totally up to you how you achieve it!


For bag two I also changed the handles, making fabric handles from the lining cotton rather than using vinyl. Because I had only a small piece of fabric left, I had to patch together the handles in two pieces each, which is why you can see a 45 degree seam in the pics below. I cut 3 inch wide strips rather than the 1.5 inches called for in the pattern. I folded this down the middle long ways, pressing well. Then I folded the long edges into the centre to meet the crease and pressed these too. Then finally fold along the original crease again to give a fabric strap with final width of 3/4 inch, top stitching down both sides. And please ignore the state of my ironing board cover, it sees a lot of action 😂


These were basted onto the outer of the bag as per the pattern, and the construction finished as described.

img_0427.jpg

One final tip though for those who sew on a vintage or flat bed machine – the final top stitch is easier if you turn the bag inside out and have your presser foot inside the bag. Sounds bonkers, but try it. In this pic I also used tissue paper between the foot and the oilcloth because even my Teflon foot hates sticky oilcloth!

img_0439

Anyway, I hope that this helps someone! It’s not a complete photo tutorial but I just wanted to capture things that our lovely group beginners might have trouble getting their head around. Any questions, please shout, either here or in the group 😀

Love Mrs B x

Sourdough deliciousness

I admit it, I’m a bread addict. Have been for a long time. I mean what in the world is better than fresh, crusty, still warm bread slathered with butter? It used to be my aim that I would make all of our bread but with 2 kids that’s a tricky one. Bread is not difficult but it takes time and attention. However since the Little One has just started nursery, I’m regaining some time that I can put towards supplying my family with things like this. So I thought I would write up what I do, because I know I’m not the only one who can’t be trusted around a homemade loaf….

White Sourdough Starter Culture

So you need a little faith here. This thing will very likely go through a phase of smelling utterly disgusting and you will probably want to throw it out, but you must resist!

1. In a large container (go bigger than you need because you will be adding to it and it needs headspace) mix one cup of strong white bread flour with one cup of water. Beat it well with a fork, whisk or food mixer, whatever you fancy, to get some air into it. Cover loosely and leave overnight at room temperature.

2. Have a look at and smell of your starter. If it’s starting to bubble and smell a little sour or beery, perfect! If not, give it a beat and leave it just one more day. Now add another cup of flour and a cup of water and beat well. Cover loosely and leave overnight again.

3. Every day for the next week or two, pour away half of the starter and add a cup of flour and a cup of water, beating well. This is “feeding” your starter. Get used to how it looks and smells.

4. When you get to the stage where the smell has settled and it is consistently bubbling away after feeding, you are ready!

5. If you are going to use it regularly or even every day, continue feeding in the same way. If you aren’t going to be using it imminently stick it in the fridge where it will sit happily for a week between feedings. When you want to use it, take it out of the fridge a couple of days before and give it a good beat and a feed to get it active again.

Here’s mine, in a totally impractical and utterly unsuitable jar 😂😀


Since your starter is unique to your environment and how you have created and treated it, it cannot be compared to anyone else’s! This is why you need to get to know it – yours might smell fruity, beery, sour or something else. But it’s yours, love it and nurture it. You can also switch the white flour for wholemeal, or even add a bit of rye. Make it your own.

White Sourdough Bread

Here I’m using the recipe amounts specified by the River Cottage Bread Handbook, but borrowing a little from Peter Reinhart’s methods in Artisan Breads Every Day. These are two of my favourite bread books (I have one more, will get back to that one some other time 😀) and I would recommend them to anyone. The River Cottage one is more mainstream and Peter Reinhart’s gives much more theory and a very different take on how to produce bread at home using some nifty techniques!

1. Make your “sponge” – mix a generous ladleful of good active starter with 500g strong white bread flour and 650ml warm water. Mix well and leave overnight to ferment

2. Add a further 600g strong white bread flour and 25g salt to the sponge and mix as best as you can. This is tricky! It will start of as a totally unmanageable, sticky mess but we’ll fix that. As long as you can can group it all together as a kind of shaggy lump, you’re good. Look, here’s mine…

3. Oil a worktop and your hands, tip out the dough and “stretch and fold” – pull the left side of the ball out and into the centre, then the right, then the top, then the bottom. Turn the ball over and put back into a clean, oiled bowl. Set a timer for 10 minutes. It will still look seriously rough.

4. When the 10 minutes is up, tip the dough out and repeat the stretch and fold process. Look at the improvement!

5. Repeat this every 10 minutes until you have a beautiful, smooth ball of dough. Four times was the charm for me and you can see the improvement with every repeat.


6. Once your dough is ready, cover and leave for 1 hour to rise. It likely won’t rise a lot at this stage, but bear with it! Once the hour is up, tip out the dough, flatten it out with your fingertips and form back into a ball. Repeat a further 3 times.

7. After 4 hours of rising and knocking back, shape as required and leave to prove for a final time until doubled in size. This final stage will take 2-3 hours, just keep an eye on it. I went for 3 baguettes, a focaccia and a boule. The focaccia is drizzled with oil, dimpled with the fingertips and sprinkled with salt before baking. Baguettes and boule were floured and slashed.


8. Throw a small cup of water in the bottom of the oven and bake at 200C for 20-25 minutes for baguettes/rolls, or longer for larger loaves. Make sure the crust is crisp and the loaf sounds hollow when the bottom is tapped. My focaccia was baked for 30 minutes (no water in the oven for this one) and the boule for 45 minutes.


9. Enjoy!

I’m afraid that focaccia is the big favourite in my house, so it wasn’t long out of the oven before it was hacked into 😀 But look at that structure! This isn’t the usual way I make focaccia and it came out with a more crisp crust than traditional focaccia maybe would, but my oh my was it tasty!

Do let me know if you make some – I won’t mind if you type with your mouth full 😉

Love Mrs B x

Where has February gone?!?

I can’t believe the second month of 2018 is almost over, but in fairness it has been a busy month for me. The most important thing that happened is that the Little One turned 3! And that means my baby will be starting nursery next week. He’s totally ready though, and he’ll OWN the place by the end of his first week, he’s just that kind of guy 😂 Birthdays mean cakes of course, but I have to admit that this wasn’t one of my finest attempts. You see, he doesn’t really like cake that much, and he has few strong preference about much else so it seemed a waste to spend umpteen hours slaving over it like I did when the Big One turned 3. So I went with simple, one layer, easy peasy decoration. Burnt the bloody thing (since I am only human, after all) but trimmed it up and all was good. Really tasty too – basically a Victoria sponge recipe with a whole heap of melted white chocolate added to the batter. Decorate with some swirly blue icing to look like water, crumbled digestive biscuit sand and a KitKat treasure chest filled with chocolate coins and MnMs, and there you go, done!

I have also done loads of sewing this month, including these adorable dachshund coin purses. My grand plan was to write a short tutorial on these but I haven’t quite managed that yet….

To help me along on my clothes sewing journey, I made pattern weights for when pins are just too much hassle. I was worried these would be too light but they actually work really nicely.

I also finally worked out the layout of my Honey Pot Bee quilt, and even made a start on sewing some of it together!

For clothing, I made a pair of leggings, a vest top and a few underwear items from the new Made for Mermaids range I mentioned in my last post. But I’m not about to put pictures of my pants on my blog, sorry!

Lastly, but certainly not least, I planted my chilli seeds. Last year was the first year in about 6 or 7 when I didn’t plant my chilli babies and I really regretted it. So this year I have played 25 seeds, 3 different types and I’m hoping for a bumper crop because I want chilli jam!

Love Mrs B x

Body Confidence

There’s a lot of love going about in the Made for Mermaids Patterns group on Facebook at the moment, and it’s all because of some exciting new pattern releases 😉 But more about that in just a minute…..

When I first started sewing, I had no interest in making clothes. It all looked so difficult and I’ve always struggled with body confidence so the thought of measuring every bit of myself in minute detail to try to fit something has always left me shuddering. As a girl who loves cake and lacks willpower the numbers are terrifying.

But as a certified fabricaholic, I joined the Facebook group of a fabric supplier and kept seeing all these amazing clothes people had made and I just wanted in on the action. I went digging to find the sources of the patterns they used and discovered a whole world I had no idea existed. I figured if they could do it, so can I! After all, I can make a decent bag with tonnes of steps and equipment and hardware, surely I could do a simple t-shirt?

So I took the plunge, and I bought ONE pattern – something loose fitting, casual, and easy enough that I would have a reasonable shot at producing something wearable. I went for the Patterns for Pirates Relaxed Raglan and I was hooked. It’s not fancy but I made it and I love it. Since then I have acquired quite a number of new patterns and actually made a fair few of them with plans to make the rest! This month, I’ve actually made myself three new tops, all of which I absolutely love 😍

Which brings me to body confidence – I think I can honestly say I’ve never felt so good. I lost 2 stones last year which has helped massively, but what has been most monumental in this has been joining the Patterns for Pirates and Made for Mermaids Patterns groups on Facebook. These groups exist specifically to support people using patterns from the respective companies, but they have got to be some of the most positive and inclusive places out there in internet land. Everyone is represented here – tall, short, thin, curvy, all the “fruit” related shapes 😂, whatever! And most importantly, that goes for the pattern testers as well as the punters like me! No longer do I have to deal with ill fitting clothes that I’ve bought leaving me feeling uncomfortable and shamed for loving cake too much 😀

So back to all the commotion at Made for Mermaids – they have just released a cute lingerie set in time for Valentines and the results really are unbelievable. There are so many people posting about their partners finally being interested in their sewing, and in most cases actually bank rolling and actively facilitating trying out the new patterns 😂 but best of all, there are so many people feeling better and more confident about themselves because there are others out there making beautiful clothes to put on their totally normal and imperfect bodies, and utterly rocking it. Well done Made for Mermaids!

So I’m just going to carry on loving cake whilst hoping my willpower makes a comeback someday, wearing my gorgeous Mama Claire that fits me, now, how I am.

img_4195

Love Mrs B x

Happy Creative New Year!

2018 is here, and I’m feeling smug because I’ve already managed to tick off two items from my big plan 😀 I’ve come into this year feeling fresh, bursting with ideas and excited about what is yet to come, so naturally I couldn’t wait to get started on my goals. This year I am trying to be more organised, tidy and methodical and to keep better records, so what better way to start than with a couple of “useful” items!?

First up was an Emmaline Retreat Bag which I’ve been planning to do for an age and never gotten round to. I bought a couple of sets of frames about a year ago and have had the perfect fabric waiting almost as long. And here it is!

<<<<<<<<<<
fect place for all my scissors, rotary cutters and associated bits and bobs, and I love the structure that the internal wire frame provides. Will definitely find a use for my spare set of frames, in fact, the Big One has requested one for all his pens 😂

Next up was a Little Moo Turnabout Pouch, another pattern that I have been desperate to try and I am so glad I did!

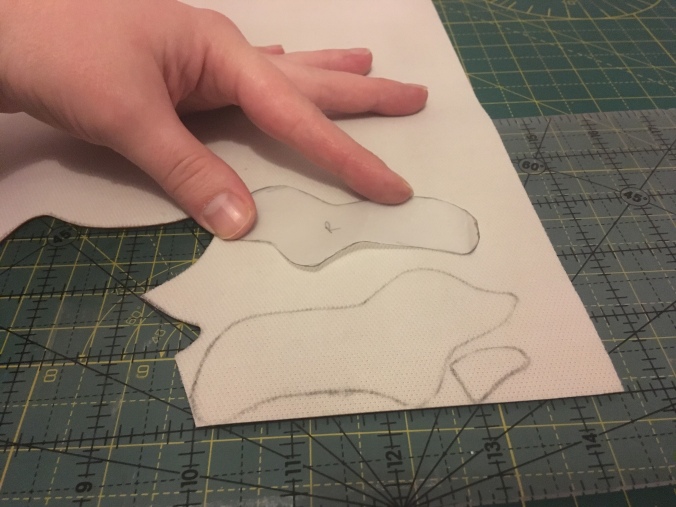
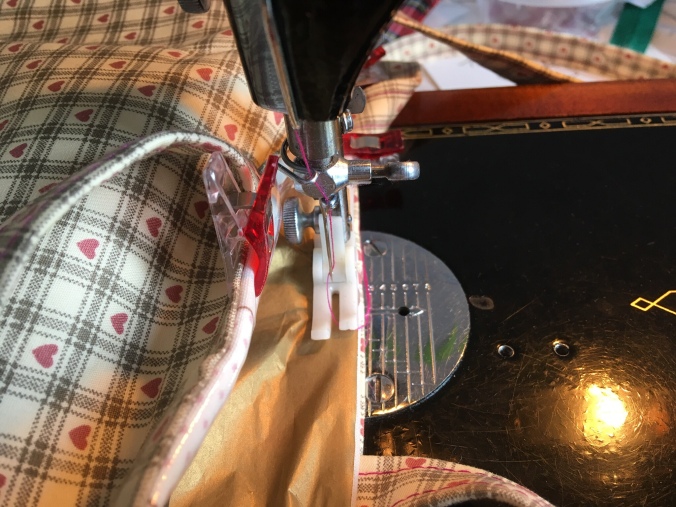
This one is home to my “bullet journaling” supplies, although I feel I should use that term loosely as I am not using it to plan anything other that craft projects – little or no real life stuff in there I’m afraid! This is such a stylish wee pouch, and it makes me smile every time I see that rainbow. That zip is a tricky little devil though and prompted one or two bad words from my sewing space….

The British Bag Makers group on Facebook (come join!) is hosting its own January challenge again this year – New Year New Bag Pattern, in which you have to make something you haven’t done before. Therefore, both of these count as contributions from me, bonus!

One of my other goals was to try to make some zipper charms for my bags using polymer clay that Santa/Dear Hubby brought me for Christmas. Since it appears that I need one or two tools to do the more fancy stuff (and I’ve blown this month’s craft supply budget), I thought I’d start simple and have a go at some swirled lentil beads taking inspiration from YouTube. I was going for galaxy effect, but alas I wasn’t totally successful. However, I got a couple of usable beads that I think are stunning, and I can’t wait to try more.

Now though, I have so many ideas that I’m on the verge of becoming “paralysed by possibility”, so I’m needing a wee kick up the bum to get going on something. I had already decided on three top patterns I fancied trying but was feeling indecisive about fabric, so tonight I just made a snap decision and went for it. Garment number 1 for 2018 is in progress, and I can’t wait to get it finished!
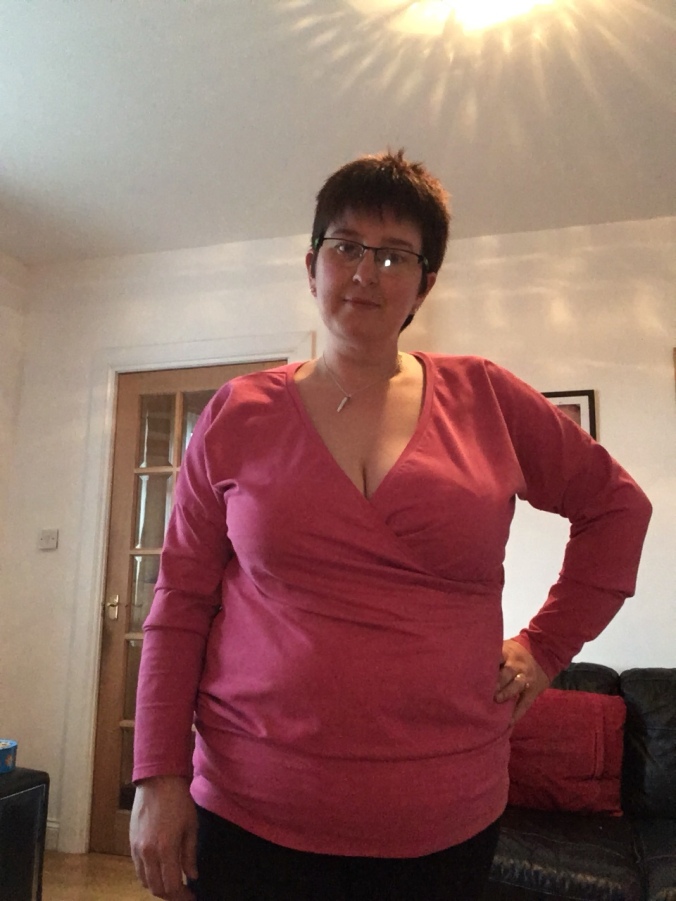
#2018PlanningParty

As the end of the year draws near, I’m still reflecting on what I’ve done in the last year and looking ahead to what I would like to do. Yvonne at Quilting Jetgirl is hosting a linky planning party on her blog so I thought I would get in on the action and get some goals down in writing in the hopes that it gives me the push to keep up with them!

First a final look at 2017

In Quilty stuff:

DSCN1027

  • I started and completed my first quilt following the Sew Fresh Quilts Have a Jolly Little Christmas quilt along
  • I also participated in the Honey Pot Bee hosted by the glittering Molli Sparkles
  • I have yet to complete my Honey Pot Bee quilt as I need to construct the top, but all the blocks are sewn and awaiting my attention
  • Through the Honey Pot Bee I have developed a bit of a thing about paper piecing, but both quilt alongs have taught me tonnes about what I’m good at and what I need to work on (accurate seam allowances mostly 😀)

In bag type stuff:

  • I’ve made quite a number of purses and bags, small and large, but accumulated even more patterns (almost 80 at last count 😳)
  • I’ve branched out materials wise, and tried my hand at faux leather, vinyl, Kraftex, oilcloth, glitter fabric and cork on top of the usual cotton.

In clothes:

  • Despite saying not that long ago that I had no interest in making clothes, I dived in and gave it a go
  • I have made 8 items of clothing for myself and one each for my two sons, mostly from two pattern companies, Patterns for Pirates and Made for Mermaids. I love their style, and the sizing and fit is perfect for me
  • I invested in my first overlocker, which is currently scaring the life out of me 😂

But the important part of this planning party is setting out what I’m going to do in 2018, so here goes!

In Quilty Stuff:img_4107

  • Finish the Honey Pot Bee Quilt – need to complete the construction of the top, sandwich, quilt and bind
  • Use up orphan blocks from Honey Pot Bee – some block tutorials produced more that one block and I know that some of the larger duplicates won’t make it into the final quilt as they might throw my colour balance. I would like to use these up, even if it’s only for an odd cushion cover or a panel in a bag
  • I received the fabulous Animal Quilts book by Juliet van der Heijden (aka the Tartan Kiwi) for Christmas and I want to complete one project from the book – and I mean complete and turn into something, not just make the animal block!
  • The town I live in has an annual Horticultural and Craft show, so I would like to complete the patchwork cushion cover I started this year and actually enter it in to the competition for 2018!

In bag type stuff:

I would like to further develop my bag making skills (but also make a couple of useful things for myself) with the following patterns being top of my list

Little Moo Turnabout Pouch

Little Moo Craftinator Project Pouch

Swoon Annette

Blue Calla Lotus

Emkie Designs Midsummers Night Traveller

Emmaline Bags Retreat Bag

  • I want to use the FIMO polymer clay that I also got for Christmas to make some cute beads for zipper pulls on my bags

In clothes:

  • I want to make at least another 6 items of clothing, including one pair of trousers and one dress

So 6 bags and 6 items of clothing plus my quilts to start/finish adds up to a minimum of one project per month – achievable, right!?! To keep me on track I have some beautiful swanky new notebooks for my bullet journal adventures and I can’t wait to get started!

See you in the New Year!

Love Mrs B x